A freestanding basin can be a stunning centerpiece in your bathroom, combining functionality with style. Whether you're remodeling or building from scratch, proper installation is key to ensuring durability, functionality, and aesthetic appeal. In this comprehensive guide, we'll walk you through each step of installing a freestanding basin, including tools you'll need, planning, plumbing, and finishing touches.
1. Understanding Freestanding Basins
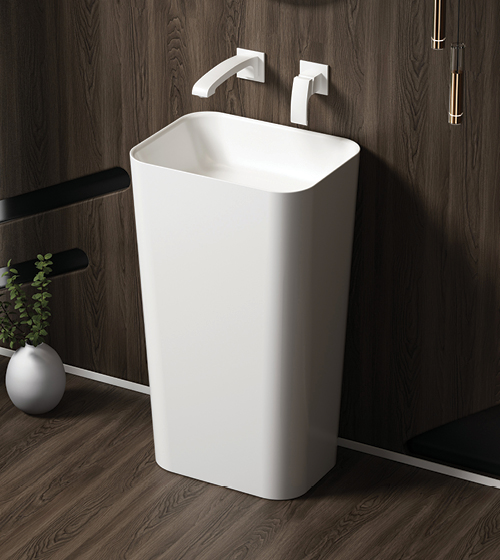
Freestanding basins, also known as pedestal sinks or standalone sinks, are designed to stand independently without requiring cabinetry or countertop support. They come in various styles, materials, and sizes, offering versatility in design.
Advantages:
- Stylish focal point
- Easy to install in small spaces
- Flexible placement options
- Easy to clean around
Considerations:
- May require robust support
- Plumbing access needs careful planning
- Space and clearance are essential for usability
2. Planning and Preparation
Measuring and Space Planning
Before purchasing or installing your basin, measure your bathroom space carefully:
- Available space: Ensure enough clearance around the basin for comfortable use.
- Height considerations: Standard basin height is approximately 32-36 inches from the floor.
- Proximity to plumbing: Locate existing water supply and drainage points or plan for new connections.
Choosing the Right Basin
Select a basin that fits your space and style:
- Material: Ceramic, stone, glass, or composite.
- Size: Compact for small bathrooms, larger for spacious areas.
- Design: Modern, vintage, minimalist, or ornate.
Gathering Tools and Materials
Ensure you have everything ready before starting:
Tools:
- Tape measure
- Level
- Drill
- Adjustable wrench
- Screwdriver
- Plumber's putty
- Teflon tape
- Pipe wrench
- Bucket and towels
Materials:
- Freestanding basin
- Support base or pedestal
- Mounting brackets (if applicable)
- Flexible hoses or pipes
- Drain assembly
- Faucet and fixtures
- Sealant or silicone caulk
- Anchors and screws
3. Pre-Installation Checks
Inspecting the Basin
Check for any damages or defects. Confirm that all parts, including the drain, faucet, and mounting hardware, are included.
Ensuring Compatibility
Verify that the basin's dimensions fit your planned space and that the plumbing connections match your existing setup or planned modifications.
4. Installing the Base or Support
Preparing the Floor
- Clean the area thoroughly.
- Check the floor's levelness using a spirit level.
- If uneven, consider using shims or leveling compound.
Positioning the Base
- Place the support or pedestal in the intended location.
- Mark the drilling points if securing to the floor.
- Confirm the position with a level to ensure the basin will sit straight.
Securing the Support Structure
- Drill holes into the floor at marked points.
- Insert anchors if necessary.
- Fix the support using appropriate screws.
- Ensure the support is stable and level.
5. Positioning the Basin
Marking the Placement
- Place the basin on the support.
- Use a pencil to mark the outline or mounting points.
- Adjust for symmetry and accessibility.
Leveling and Alignment
- Check the basin with a spirit level.
- Adjust as needed by shimming or repositioning.
- Confirm that the basin is stable and level.
6. Connecting Plumbing
Installing the Drain
- Assemble the drain flange and gasket.
- Apply plumber’s putty around the drain opening.
- Insert the drain into the basin’s drain hole.
- Tighten the locknut underneath.
- Connect the drain pipe to the waste outlet.
Connecting Water Supply
- Attach flexible hoses to the water inlet valves.
- Connect the other ends to the faucet fittings.
- Use Teflon tape on threaded connections to prevent leaks.
Ensuring Leak-Free Fittings
- Tighten all connections securely.
- Turn on the water supply gradually.
- Check for leaks around connections and fittings.
7. Securing the Basin
Fixing the Basin to the Support
- Depending on the basin design, secure it using mounting brackets, adhesive, or screws.
- Follow manufacturer instructions for specific attachment methods.
Sealing and Caulking
- Apply a bead of silicone sealant around the base of the basin.
- Smooth the sealant with a finger or tool.
- Allow sealant to cure as per manufacturer instructions.
8. Final Checks and Testing
Checking for Leaks
- Turn on the water supply fully.
- Run water through the drain.
- Inspect all connections for leaks.
- Tighten fittings if necessary.
Verifying Stability
- Gently press on the basin to ensure it is securely fixed.
- Confirm that the basin does not wobble or shift.
9. Finishing Touches
Attaching Faucets and Accessories
- Install the faucet, soap dispenser, and other accessories.
- Follow manufacturer instructions.
- Ensure proper operation and secure fittings.
Cleaning and Maintenance Tips
- Clean the basin surface with suitable cleaners.
- Regularly check for leaks or signs of wear.
- Maintain seals and fittings for longevity.
10. Troubleshooting Common Issues
| Issue | Possible Cause | Solution |
|---|---|---|
| Leaking drain | Loose fittings or damaged gasket | Tighten fittings, replace gasket |
| Wobbly basin | Unsecured support or uneven floor | Re-secure support, level floor or add shims |
| Low water pressure | Clogged supply lines | Clean filters, check for blockages |
| Cracks or chips | Handling damage | Contact manufacturer for repair or replacement |
11. Safety and Compliance Tips
- Turn off water supply before working.
- Use appropriate personal protective equipment.
- Follow local plumbing codes and regulations.
- If unsure, consult a professional plumber.
Conclusion
Installing a freestanding basin is a rewarding project that can enhance the style and functionality of your bathroom. Proper planning, careful measurement, and attention to detail during installation will ensure a durable and attractive result. Remember, patience and precision are key—if you encounter challenges, don't hesitate to seek professional assistance. With this step-by-step guide, you're well-equipped to undertake your bathroom upgrade confidently.
Let's Connected
Name: Nood Co Concrete Basins & Baths
Address: Unit 7/7 O'Malley St, Osborne Park WA 6017, Australia
Phone: +61863369403
Map: https://maps.app.goo.gl/AqdRQUzCnTrEDoDz8